A flat tire can turn a short ride into a long walk. A mini bike tire inflator may fit inside a small saddlebag, yet its size alone does not make it a good choice. For this 2026 guide, we focus on practical details: pressure range, gauge readability, valve compatibility, battery life, charging options, and how easily each pump packs away. We also consider heat, noise, hose reach, and whether controls are simple enough to use beside the road.
The right inflator depends on your bike and riding habits. A lightweight model may suit occasional top-ups, while frequent riders may prefer a stronger battery and clearer pressure display. Check the pump’s stated limits against your tire requirements, and follow the pressure guidance from your tire or bike manufacturer. Small gauges can be hard to read in bright sunlight. That matters. Product specifications and owner feedback can help narrow the options, but neither guarantees a perfect experience. Even a promising pump may feel slow when a tire is fully flat, and compact designs sometimes involve compromises. We have not treated every feature as equally important. The picks below compare useful strengths and trade-offs, so you can find an inflator that fits your ride, storage space, and budget without relying on size claims alone.
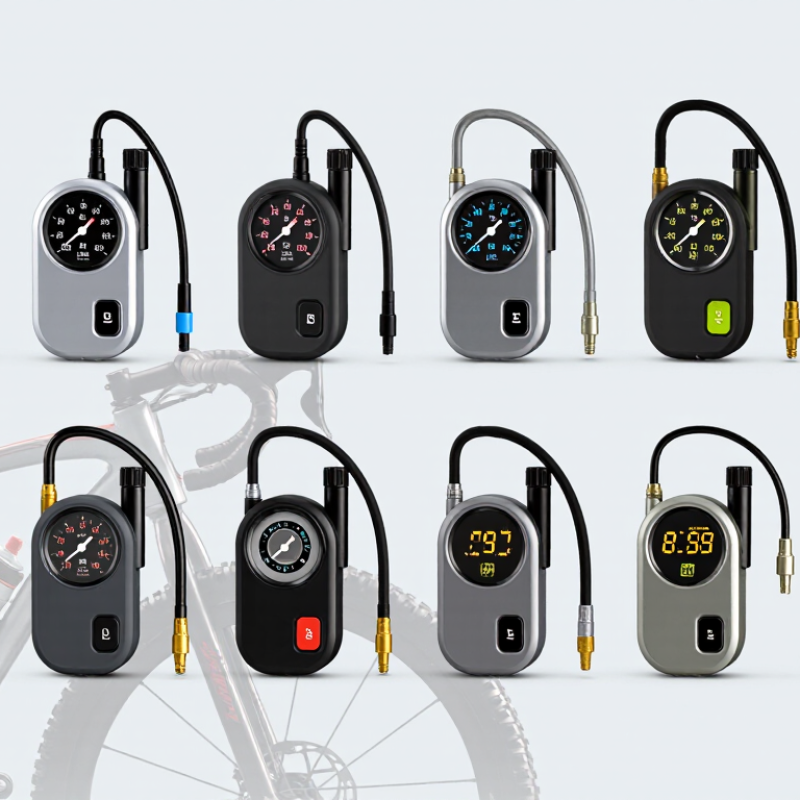
A mini bike tire inflator is a compact pump for correcting tire pressure away from a workshop. It can help after a slow leak or a temperature change leaves a tire underinflated. That matters: low pressure can affect handling, while excess pressure can reduce grip and ride comfort. A small pump is useful, but it is not a substitute for checking the tire.
The right pressure depends on the bike and tire. Check the owner’s manual or the bike’s pressure label; the number printed on a tire may show its maximum, not the recommended riding pressure. Look for an inflator with a readable gauge, a hose that reaches the valve easily, and a power source suited to your rides. Schrader and Presta valves are common, but compatibility should be confirmed before buying.
Mini inflators usually work more slowly than full-size workshop compressors. Some also become warm during extended use, so follow the maker’s instructions and allow cooling when needed. A gauge can be off by a little, too. Check pressure with a separate gauge occasionally, especially before a longer ride. Test the pump at home, not beside a dark road. It is a backup tool, not magic.
Choosing a mini bike tire inflator in 2026 starts with pressure accuracy, not advertised speed. Check your bike’s manual for its recommended PSI; the tire’s maximum pressure is not the target. NHTSA tire-safety guidance advises checking pressure monthly and notes that pressure can change by about 1 PSI for every 10°F temperature shift. That guidance concerns vehicle tires, so use it as a maintenance reminder, not a mini-bike specification. Check tires when cold. Small details matter.
Match the inflator’s gauge range to your bike’s required pressure, and confirm that its valve connection fits your tires. A clear digital display helps, but an automatic shutoff is useful only if the gauge is accurate. Look for a flexible hose, a stable base, and enough battery capacity for more than one top-up. A bright screen is handy beside a dim garage wall. Heat buildup and noise are easy to overlook; compact pumps may need pauses between tires. I would favor a dependable reading over a dramatic inflation-time claim. Test the gauge against a trusted pressure checker occasionally, because even a convenient tool can drift.
Check that an inflator’s pressure capacity suits the tires you ride. These are typical starting-pressure ranges by bicycle tire type, not universal targets.
Always follow the pressure range printed on your tire and adjust for tire width, rider weight, load, and riding conditions.
Comparing ten mini bike tire inflators means looking beyond their compact size. Check the stated pressure range, airflow, battery capacity, and inflation time. These figures describe different things: a high pressure limit does not guarantee fast inflation. For a roadside flat, a clear pressure display and simple controls can matter more than extra modes. Small details count.
Weight and shape affect where each unit fits. A slim inflator may sit neatly in a frame bag, while a wider model can be easier to hold with cold fingers. Compare hose length, valve compatibility, and whether an adapter is included. A short hose can make inflation awkward beside a crowded wheel. Annoying, but real.
Heat management, charging method, and automatic shutoff also separate the ten options. Repeated use may warm a small pump, so check the maker’s stated duty cycle and allow cooling when required. Battery indicators are useful, though they may not show precisely how many tires remain. Price should be weighed against these practical features, not treated as a quality guarantee. I would also leave room for uncertainty: published test conditions differ, and a pump’s real performance can change with tire size, starting pressure, and temperature.
Top 10 Mini Bike Tire Inflators to Buy in 2026?
How to Inflate a Bike Tire Safely and Accurately
Before inflating, check the tire for cuts, embedded grit, or a loose bead. Read the pressure range printed on its sidewall; the maximum is a limit, not necessarily the right target. A rider’s weight, tire width, and riding surface all affect the useful pressure. When in doubt, follow the tire or bicycle maker’s guidance. Small differences matter less than avoiding an obviously soft or overfilled tire.
Identify the valve before attaching your mini inflator. A Presta valve usually needs its small tip loosened; a Schrader valve does not. Fit the pump head straight and secure it gently. Keep it aligned. A bent valve can leak or break, especially when a short hose is under tension. Inflate in short strokes, pausing to check pressure with a gauge rather than guessing by thumb. Pump gauges can vary slightly, so don’t chase every tiny difference. Stop within the recommended range, then check that the tire bead sits evenly around the rim. It’s easy to rush that last look. I would still make it part of the routine.
Brand-neutral comparison of common compact inflator types. Features vary by model; check the product’s stated pressure limit, valve compatibility, and instructions before use.
| # | Inflator type | Power source | Best suited to | What to expect | Accuracy and compatibility checks | Safe-use tip |
|---|---|---|---|---|---|---|
| 1 | Compact rechargeable electric pump | Rechargeable battery | Riders who want powered inflation in a small package | Reduces hand pumping; battery capacity, inflation time, and size differ by model. | Look for a stated pressure limit and a compatible Presta or Schrader connection. Treat the built-in gauge as a guide unless its accuracy is specified. | Follow the duty-cycle instructions; the pump or hose may become warm during operation. |
| 2 | USB-rechargeable micro pump | Rechargeable battery, typically charged by USB | Commuting and day rides where compact storage matters | Very portable, but a small battery may limit how many tires it can inflate per charge. | Check charging requirements, valve attachment, and the manufacturer’s stated capacity for your tire size and target pressure. | Charge before a ride and carry a backup plan for a depleted battery. |
| 3 | Mini pump with digital gauge | Manual pumping; battery for the display may be required | Riders who want a numerical pressure readout on the pump | Combines a hand pump with a digital pressure display; adds electronics and may be bulkier than a basic pump. | Check the gauge’s units and stated measurement range. A separate, reliable gauge can help verify pressure. | Use the pressure range printed on the tire sidewall and follow the bicycle or tire maker’s guidance. |
| 4 | Mini pump with analog gauge | Manual pumping | Riders who prefer a gauge without an electronic display | Provides a visible pressure indication without a display battery; small gauge markings can be harder to read. | Confirm the scale covers your intended pressure and can be read clearly. Gauge precision varies between models. | Keep the pump head aligned with the valve to avoid bending or loosening the valve stem. |
| 5 | High-pressure mini hand pump | Manual pumping | Narrower tires that require higher pressure than wider tires | Designed to reach higher pressures with less air per stroke, so filling a larger-volume tire can take more effort. | Verify its rated maximum pressure and valve fit; do not assume the pump’s maximum is the correct tire pressure. | Stop at the pressure appropriate for the tire and rider; never exceed the tire’s marked limit. |
| 6 | High-volume mini hand pump | Manual pumping | Wider tires that need more air volume at comparatively lower pressure | Moves more air per stroke than many high-pressure designs, but may be less suited to very high-pressure tires. | Check the pump’s pressure rating against the target pressure for your tire; “high volume” does not mean unlimited pressure. | Inflate in stages and recheck with a suitable gauge rather than relying on tire feel alone. |
| 7 | Dual-action mini pump | Manual pumping | Riders seeking faster manual inflation for everyday repairs | Moves air on both the push and pull strokes on designs that use this mechanism; effort and pressure capability vary. | Check the stated pressure limit, hose or head design, and compatibility with your valve type. | Use controlled strokes and keep fingers clear of moving parts. |
| 8 | Telescopic mini hand pump | Manual pumping | Riders who want a compact pump that extends for use | Retracts for storage and extends to provide a longer stroke; moving sections add seals that need to remain clean. | Confirm the extension mechanism locks securely and that the pump is rated for your target pressure. | Extend and lock it as instructed before pumping; avoid forcing a stuck section. |
| 9 | CO₂ inflator head with cartridge | Disposable compressed CO₂ cartridge | Quick roadside inflation when minimal pumping effort is a priority | Inflates quickly, but each cartridge is a limited-use supply and cartridge size affects how much air is available. | Check cartridge and valve compatibility, and whether flow is controlled. Follow the inflator instructions for tire size. | CO₂ discharge can become very cold; use the supplied insulation or handle and keep skin away from the cartridge outlet. |
| 10 | Mini hand pump and CO₂ inflator combo | Manual pumping plus a separate CO₂ cartridge | Riders who want a reusable backup and a rapid-inflation option | Offers two inflation methods, but the combined setup may take more space and still requires compatible cartridges. | Check that the pump and inflator fit your valve and that the CO₂ component accepts the cartridge type you carry. | Practice using both methods at home and carry a spare tube or repair supplies appropriate to your setup. |
Safe inflation checklist: Inspect the tire and rim for damage, identify the valve type, and use the pressure guidance printed on the tire and supplied by the bicycle or tire maker. Inflate gradually, keep the pump head straight, and use a reliable gauge to confirm the final pressure. Do not exceed the tire’s marked pressure limit.
A mini bike tire inflator works best when its hose, power source, and air inlet stay clean. After use, switch it off and let the casing cool before packing it away. Wipe dust from the body with a dry cloth. Check the hose for cracks, kinks, or a loose connection. Small damage can become a frustrating leak on your next ride.
Store the inflator in a dry place, away from direct sun, damp floors, and sharp tools. Keep its nozzle and adapters together in a small pouch; they are easy to misplace. For battery-powered models, follow the maker’s guidance on charging and long-term storage. If the battery is removable, take it out only when the design allows it. I sometimes forget to check the hose after a quick top-up. That small habit is worth fixing.
Tips: Before storage, clear debris from the air inlet and make sure the unit is fully off. Keep the manual nearby for battery care, and avoid leaving the inflator loose in a hot vehicle. A quick inspection every few weeks can catch worn parts early. Don’t force a damaged connector; replace it before relying on the inflator.
It adds air when a tire loses pressure away from a workshop. It is a backup tool, not a complete tire check.
Check the bicycle manual or its pressure label. The number printed on a tire may be its maximum, not the riding target.
Yes. A soft tire can affect handling, while too much pressure may reduce grip and comfort.
Look for cuts, embedded grit, or a loose bead. Small details matter.
Presta valves usually have a small tip that needs loosening. Schrader valves do not. Confirm your inflator fits the valve.
Fit the pump head straight and secure it gently. Keep it aligned; a bent valve can leak or break.
No. Pump gauges can vary slightly, so check pressure with a separate gauge sometimes, especially before a longer ride.
Usually not. They may warm during extended use, so follow the instructions and allow cooling when needed. Test yours at home.
This guide explores the role of a mini bike tire inflator and explains how a compact pump can help cyclists manage tire pressure at home or on the road. It outlines the key points to consider when choosing one in 2026, including portability, power source, inflation speed, pressure readings, ease of use, and compatibility with different valves. A comparison of ten options by practical features can help readers decide which type best suits their riding habits and budget.
The guide also covers safe, accurate inflation: check the tire’s recommended pressure, secure the connection, inflate gradually, and confirm the reading before riding. To keep an inflator dependable, readers will learn to clean it, inspect its hose and fittings, recharge or replace its power source as needed, and store it in a dry, protected place.